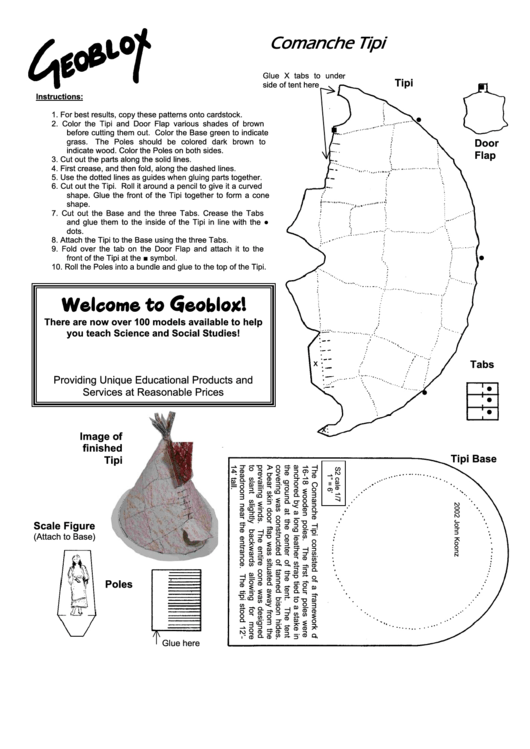
Comanche Tipi Paper Model
ADVERTISEMENT
Comanche Tipi
Glue X tabs to under
Tipi
side of tent here
■
Instructions:
1.
For best results, copy these patterns onto cardstock.
●
2.
Color the Tipi and Door Flap various shades of brown
■
before cutting them out. Color the Base green to indicate
grass.
The Poles should be colored dark brown to
Door
indicate wood. Color the Poles on both sides.
Flap
3.
Cut out the parts along the solid lines.
4.
First crease, and then fold, along the dashed lines.
5.
Use the dotted lines as guides when gluing parts together.
6.
Cut out the Tipi. Roll it around a pencil to give it a curved
shape. Glue the front of the Tipi together to form a cone
shape.
7.
Cut out the Base and the three Tabs. Crease the Tabs
and glue them to the inside of the Tipi in line with the ●
dots.
8.
Attach the Tipi to the Base using the three Tabs.
9.
Fold over the tab on the Door Flap and attach it to the
●
front of the Tipi at the ■ symbol.
10. Roll the Poles into a bundle and glue to the top of the Tipi.
Welcome to Geoblox!
There are now over 100 models available to help
you teach Science and Social Studies!
x
Tabs
Providing Unique Educational Products and
●
Services at Reasonable Prices
●
●
●
x
Image of
finished
Tipi Base
Tipi
Scale Figure
(Attach to Base)
Poles
Glue here
ADVERTISEMENT
0 votes
Related Articles
Related forms
Related Categories
Parent category: Miscellaneous
 1
1


