Hexagon Quilt Template
ADVERTISEMENT
 1
1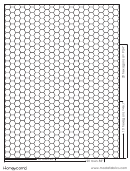 2
2Precut Hexagons
6" from point to point
100% Cotton
6"
6" wide x 5.196" tall
5.423" wide x 4.67" tall
unfinished
finished
How to sew hexagons together by machine.
1
4
Use the template found at the base of the
Flip row B onto row A to align the two edges for
Honeycomb
™
package to mark the 1/4" intersections
sewing. Sweep any seams away from the hexagon
on the wrong side of the hexagons.
so that the two hexagons lay flat and are aligned.
B
1/4"
A
align for sewing
B
template
wrong side
A
2
Arrange the hexagons in the desired pattern.
You will sew the hexagons together in vertical rows.
Reduce the stitch length to 2.0 (13 stitches/inch). This
will make it easier to start and stop on the 1/4" marks.
First, sew the hexagons in rows. Layer 2
hexagons, right sides together, start sewing at the
1/4" mark, backstitch or lock the stitches. Use an
accurate 1/4" seam allowance to sew the seam.
Stop at the 1/4" mark and backstitch. Row diagrams
show seams finger-pressed open. Finish sewing the
hexagons in rows.
5
Start sewing at the 1/4" mark, then backstitch and
continue to sew the 1/4" seam. Stop sewing at the
1/4" mark, backstitch.
Start at
1/4" mark
backstitch.
Start at 1/4" mark,
backstitch.
Stop at
1/4" mark
backstitch.
Stop at 1/4" mark,
backstitch.
Finger press the seams.
DO NOT press the seams! Leaving the seams unpressed until the end will
make it much easier to maneuver the hexagons to sew the rows together.
6
Remove the hexagon rows from the sewing
machine. Open the seam to make sure the stitches
did not catch the next hexagon creating a pucker.
Continue to sew the rows together, one hexagon
side at a time. When a row is complete, add the
next row until the top is done.
ADVERTISEMENT
0 votes
Related Articles
Related forms


Related Categories
Parent category: Miscellaneous