Snowflake Pillow Template Page 5
ADVERTISEMENT
 1
1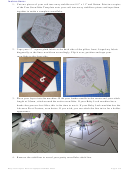 2
2 3
3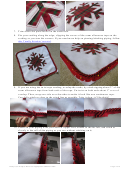 4
4 5
5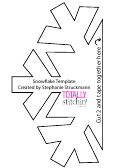 6
611. Using the narrow zipper foot, align the top edge of the zipper with the lower left edge of
the back side of the pillow. Line up your zipper so that when you stitch it on, you’ll be
stitching at a 1/2” seam allowance. Stitch as closely to the zipper teeth as you can without
stitching on top of them. Do the same for the lower edge of the front side, but, line up the
zipper teeth as closely as you can to the cording. Again, take it slow over the overlap!
After sewing, double check that it zips! Then, zip it up halfway. TIP: If you need to
shorten your zipper, stitch with a wide zigzag and a 0mm stitch length and create a new
bar tack over the zipper and create a new end. Cut off the excess zipper.
12. Place pretty sides together and stitch around the remaining 3 sides of your pillow with a
standard stitch length and a ½” seam allowance stitching over both zipper ends. Follow
the stitching on the back of the front piece that is there from sewing the cording on. Stitch
once and then remove the pins. Stitch a second time to get in closer to the roping if
needed. After sewing, reach inside your pillow; unzip the rest of the pillow. Turn right
side out and stuff with your pillow form or stuffing. And lastly, admire your work! We
love to see what you’re making with our projects! Show us your spin on this project; post
a picture on our Baby Lock Facebook Page or Instagram?
For other exciting projects like this one, visit our websites at
or
Baby Lock Project: Reverse Applique Snowflake Pillow
Page 5 of 5
ADVERTISEMENT
0 votes
Related Articles
Related forms


Related Categories
Parent category: Miscellaneous