Flute Kit Instructions And Fingering Charts Page 4
ADVERTISEMENT
Walt LaForet,
P.O. Box 222, Chalfont, PA 18914
Native American Flutes and & Accessories
Flute Kit Instructions
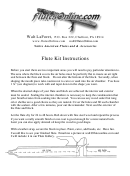
Before you start there are two important areas you will need to pay particular attention to.
The area where the block covers the air holes must be perfectly flat to insure an air tight
seal between the flute and block. Do not alter the bottom of the block. Secondly, when
shaping the mouth piece take caution not to carve or sand into the air chamber. You have
1 ¼" (see diagram) to work with and taper down in the shape you want.
When the desired shape of your flute and block are achieved the interior and exterior
must be sealed. Sealing the interior chambers is necessary to keep the condensation that
your breath creates from soaking into the wood. You can use any wood sealer but tung
oil or shellac are a good choice as they are natural. Cover the holes and fill each chamber
with the sealant. After a few minutes, pour out the remainder. Next seal the exterior of
the flute and block.
Let the flute dry for 24 to 48 hours. Rub down with fine steel wool and repeat the process
if you want a really smooth finish or one coat is good enough for a more natural look.
Later you can also apply almond oil keep the wood in good shape.
With a leather strap, secure the block in place. Paint, carve, add beads, etc. Have fun.
I would like to see your finished flute. Email me a picture at and
I will include it in our Flute Gallery.
ADVERTISEMENT
0 votes
Related Articles
Related forms
Related Categories
Parent category: Life
 1
1 2
2 3
3 4
4


