Rock Cycle Lab Page 2
ADVERTISEMENT
 1
1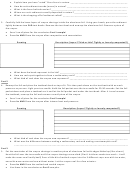 2
2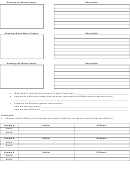 3
3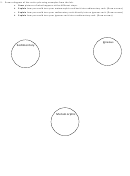 4
4a. Explain how you have “acted” like a force in nature. ___________________________________________
b. How do rock sediments erode (move) in nature? ______________________________________________
c. What is the force behind erosion? _________________________________________________________
d. Where are rock sediments usually deposited in nature? ________________________________________
e. What is the dropping off of sediment called? _________________________________________________
3. Carefully fold the loose layers of crayon shavings inside the aluminum foil. Using your hands, press the sediment
tightly between two OLD text books. Remove the text book and unwrap the aluminum foil. Remove a piece of
the crayon.
Save 1 small piece for the conclusion Part 1 sample!
Describe AND Draw the crayon after compaction and cementation:
Drawing
Description (Layers? Thick or thin? Tightly or loosely compacted?)
a. What does the book represent in the lab? ___________________________________________________
b. How are rocks put together to form a sedimentary rock? _______________________________________
c. What kind of rock does the crayon now represent? ____________________________________________
Part 2
4. Rewrap the foil and place the textbook back on top of it. This time push down on the text book with as much
pressure as you can. Light your tea candle. Hold the foil packet over the tea candle for 20-30 seconds. Set the foil
packet down and place a textbook on it and let the foil packet cool under the text book. After it is cool remove
the textbook, unwrap the foil and remove a small piece of the crayon.
Save 1 small piece for the conclusion Part 2 sample!
Describe AND Draw the crayon after intense heat and pressure:
Drawing
Description (Layers? Tightly or loosely compacted?)
a. What kind of rock does the crayon now represent? ____________________________________________
b. What was the difference between making a sedimentary rock and making a metamorphic rock?
______________________________________________________________________________________
Part 3
5. Put the remainder of the crayon shavings in another piece of aluminum foil with edges folded up (like a boat.)
Heat the foil over the tea candle until the crayon shavings are melted. (Don’t let them smoke too much – it will
make the room smell really bad!) Pour a little bit of melted crayon into the 3 different cups: one with ice water,
one with warm water and one without water. Let the crayon cool for a few minutes.
Describe AND Draw the melted and cooled crayon:
Use these in the conclusion as Part 3 samples.
ADVERTISEMENT
0 votes
Related Articles
Related forms


Related Categories
Parent category: Education