Santa Claus Craft Template Page 4
ADVERTISEMENT
Santa Claus Paper Craft: Instructions
Page 4 of 4
1. Cut out the Santa Claus Character and its pieces. On the main character piece, make folds (away from you) along the
dotted lines, including the tabs. Fold the legs toward you and the knees away from you. Glue tab A to the back side of the
Santa Claus’s back. The character should be taking shape.
2. Put glue on the eight small tabs (four per side) that are located on the sides of the top of Santa Claus’s head. Then glue
them to the back side of the Santa Claus’s head. Make sure you hold each one in place for a few seconds before you move
on. Next, glue tab B to the back of the side of Santa Claus’s head.
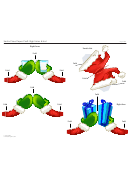
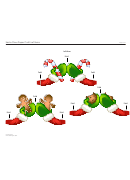
3. Cut out the arms. There are three choices for right arms and three choices for left arms. Keep them connected in the
middle and fold it in half. Bend the tabs toward you, and then glue the back sides of the arm (leaving glue off the tabs)
together. Be sure to not glue the tabs to each other. Repeat this with the right arms. Once the arms are dry, put glue on the
open tabs and glue the arms to each side of Santa Claus. Choose which arms you want to use. Use the same technique to
cut out and fold the ears.
4. Cut out Santa’s hat. Keep the hat connected in the middle when you cut it out, and then fold them in half. Fold each tab
toward you, then glue the back sides of the hat (don’t put glue on the tabs yet) together. Be sure not to glue the tabs to
each other. Next, put glue on the back side of the open tabs. Glue the hat to the top of Santa Claus’s head. Your Santa
Claus Character is now complete! Place him on the edge of a shelf or table, or give him as a gift!
FamilyFun
ADVERTISEMENT
0 votes
Related Articles
Related forms
Related Categories
Parent category: Life
 1
1 2
2 3
3 4
4


