Let It Snow Wall Hanging Page 4
ADVERTISEMENT
 1
1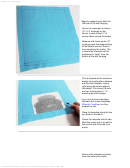 2
2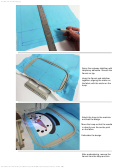 3
3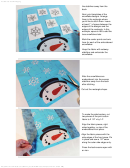 4
4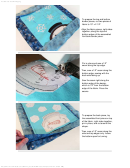 5
5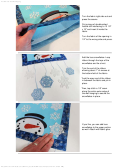 6
6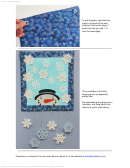 7
7Let It Snow Wall Hanging
the stabilizer away from the
back.
Next, print templates of the
snowflake designs. Arrange
them in the rectangle where
you'd like to stitch them. Leave
at least 1" of space between the
edges of the designs and the
edges of the rectangle. In this
example, space is left to add the
lace snowflakes later.
Mark the center points and axis
lines for each of the embroidered
snowflakes.
Hoop the fabric with cutaway
stabilizer and embroider the
snowflakes.
After the snowflakes are
embroidered, trim the excess
stabilizer away from the back
after stitching.
Cut out the rectangle shape.
To make the side borders, cut
two pieces of the print cotton
fabric to 2 1/2" x by 14".
Align the fabric pieces, right
sides together, on top of the
embroidered front piece.
Align the fabric pieces with the
side edges of the front piece. Pin
in place and sew a 1/2" seam
along the outer side edges only.
Press the back seams open with
an iron.
file:///fileserver/Files/Source/ELProjects/html/PR1885.html[4/7/2016 2:04:06 PM]
ADVERTISEMENT
0 votes
Related Articles
Related forms


")
 - Jesus Culture")
 - Jesus Culture")

 Chord Chart")


Related Categories
Parent category: Miscellaneous