Ptc Genetics Lab Student Worksheet Page 6
ADVERTISEMENT
 1
1 2
2 3
3 4
4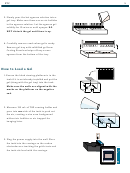 5
5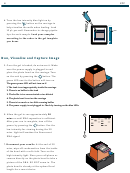 6
6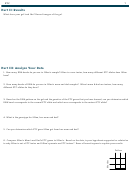 7
7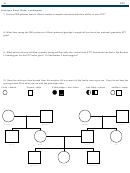 8
8 9
9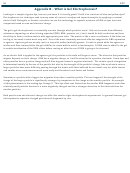 10
106
PTC
4. Turn the low intensity blue light on by
pressing the
button on the carriage to
help visualize the wells when loading. Load
10 μL per well. Remember to change pipette
tips for each sample. Load your samples
according to the order in the gel template
you drew.
Run, Visualize and Capture Image
5. Once the gel is loaded, do not move it. Make
sure the power supply is plugged in and
place the photo hood on the carriage. Turn
on the unit by pressing the
button. The
green LED next to the button will turn on.
The green power LED will not turn on if:
1. The tank is not appropriately inside the carriage
2. There is no buffer in the tank
3. The buffer is too concentrated or too diluted
4. The photo hood is not on the carriage
5. There is too much or too little running buffer
6. The power supply is not plugged in. Check by turning on the blue LEDs
-
6. Allow the gel to run approximately 20
mins or until DNA separation is sufficient.
After your run is complete, turn off the
power by pressing the
button. Use the
low intensity for viewing during the 20
mins. Light will weaken the fluorescent
+
DNA signal.
7. Document your results. At the end of 20
mins, wipe off condensation from the inside
of the hood with a soft cloth. Turn on the
high intensity light. Place your cell phone or
camera directly on the photo hood to take a
picture of the DNA. DO NOT zoom in. The
photo hood is already at the optimal focal
length for a smart device.
ADVERTISEMENT
0 votes
Related Articles
Related forms


Related Categories
Parent category: Education